
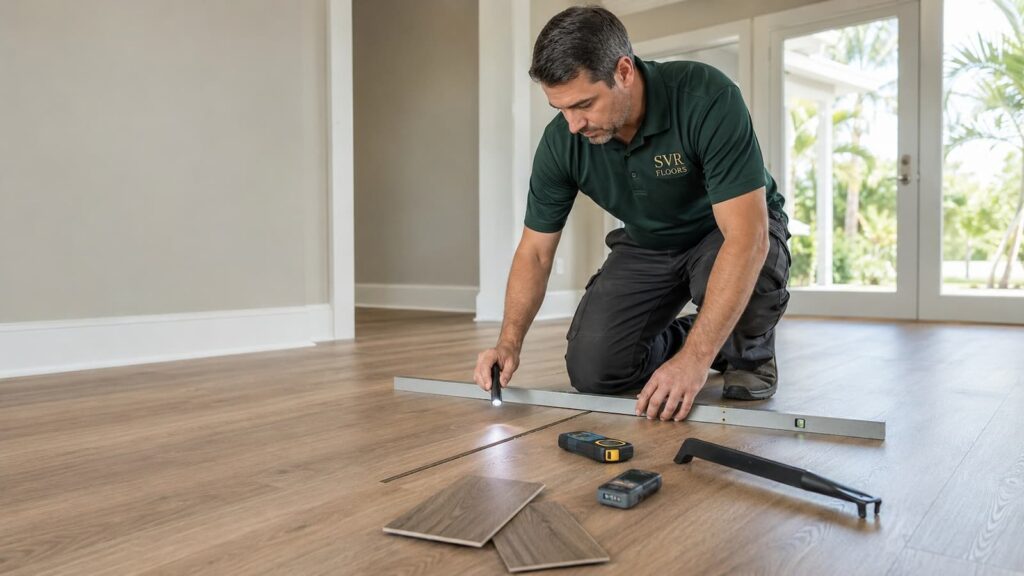
One quiet click is easy to ignore. The luxury vinyl plank floor still looks normal, after all. A few weeks later, the same spot may flex, and then a narrow gap appears at the end of a plank. Homeowners often describe all of this as “the floor moving,” but those symptoms do not always come from the same problem.
In a floating LVP floor, the planks are connected to one another rather than fastened to the slab or subfloor. The installed field needs consistent support underneath, intact locking edges, enough room to expand, and freedom to move as one unit. If one of those conditions is missing, the floor may click, separate, shift, peak at a seam, or feel loose underfoot. With glue-down LVP, movement usually points in a different direction: the adhesive bond, the surface beneath it, or moisture affecting that bond.
The location and timing of the symptom matter. A click that happens over the same low spot is different from several end joints opening across a sunny room. A floor that began moving the day it was installed tells a different story from one that changed after a dishwasher leak. Pushing a plank back into place may hide the gap for a while, but it will not correct an uneven slab, a damaged lock, a pinned perimeter, or a failed adhesive bond.
This guide explains how to tell those conditions apart, which repairs may be practical, and when a separated or noisy LVP floor needs to be opened so the cause can be corrected. Product instructions still control the final answer. Expansion space, flatness limits, underlayment, transition requirements, and repair methods vary among LVP systems, even when the planks look similar. Start there if the carton or installation guide is still available.
The Short Answer: LVP Moves When the Flooring System Loses Support, Restraint, or a Reliable Bond
Most cases of separating, clicking, or moving LVP trace back to one or more of four conditions. A floating plank may be bridging a low spot instead of resting evenly on the floor. Its click-lock edge may be partly engaged or already damaged. The whole floor may be trapped against a wall, cabinet, doorway, or fastener, leaving it unable to expand normally. Or the installation may include an incompatible underlayment, weak substrate, moisture problem, or layout detail that places too much stress on the joints.
Glue-down LVP has no click-lock field that needs to float. If a glued plank slides, curls, releases, or makes a tacky sound under pressure, the more likely concerns are inadequate adhesive transfer, the wrong open time, dust or residue on the substrate, moisture, a weak patch, or traffic before the adhesive was ready.
Start with the symptom under your feet:
| What the Floor Is Doing | What It Often Suggests | What Needs to Be Checked |
|---|---|---|
| Clicks or flexes in the same small area | Low spot, debris, soft substrate, or too much cushion | Flatness and support beneath the affected planks |
| Short-end gaps keep reopening | Damaged or incompletely engaged end locks, plank movement, or poor joint staggering | Locking lips, row alignment, subfloor support, and layout |
| Several seams tighten and open with temperature changes | Restricted expansion, direct solar heat, or an oversized continuous run | Perimeter gaps, fixed objects, doorways, transitions, and indoor conditions |
| A long side separates or one edge sits higher | Long joint not fully engaged, high spot, broken lock, or pressure within the floor | Joint profile, flatness, and whether the floor is pinned |
| The entire floating field shifts near an edge | Loose or incorrectly installed edge and transition details, excessive free movement, or a perimeter problem | Transitions, wall clearance, trim, and manufacturer requirements |
| A glue-down plank slides, curls, or releases | Adhesive, substrate, moisture, or early-traffic problem | Bond transfer, slab condition, moisture, and adhesive compatibility |
This table narrows the search; it does not replace opening the floor where necessary. Two problems can also exist together. A low spot can make a plank flex until the locking lip breaks, for instance. Once the lock is damaged, leveling the floor alone will not make that joint reliable again.
First, Confirm Whether the LVP Is Floating or Glue-Down
The installation method changes the diagnosis. Floating LVP usually has a rigid SPC or WPC core and edges that click together. It rests over the prepared surface, sometimes with an attached pad and sometimes over a manufacturer-approved underlayment or vapor-control layer.
Baseboards, shoe molding, and transitions conceal the perimeter space, but they should not clamp the planks to the subfloor.
Glue-down LVP is bonded directly to the prepared substrate. It is often thinner, feels firmer underfoot, and does not move as a connected floating sheet. A gap between glued planks may come from a plank shifting while the adhesive was wet, incorrect placement, dimensional change, or adhesive failure. Clicking in a glue-down floor can come from a loose plank flexing against partially bonded adhesive, but it is not the same mechanism as a click-lock joint flexing over a void.
If you do not know which system you have, check a floor vent, transition, loose edge, or spare plank rather than prying up a finished seam. Product boxes and invoices may identify the installation method. A flooring professional can usually tell from the plank thickness, edge profile, and the way the floor responds underfoot. The distinction is also covered in more detail in SVR FLOORS’ guide to floating versus glue-down vinyl plank flooring.
Cause 1: The Subfloor Is Not Flat Enough to Support the Planks
An unsupported plank behaves a little like a short bridge. It spans the low area, then bends when weight passes over it. The movement may be slight enough that you only hear a click.
Over hundreds of steps, though, that flexing works the locking edges up and down. The joint may loosen, polish itself from friction, chip, or finally open.
Low spots are not the only concern. A high ridge can hold part of a plank up and turn the nearby seam into a pressure point. Old thinset, a rough concrete patch, adhesive residue, a curled vapor barrier, or debris left beneath the floor can create a similar effect. On a wood subfloor, loose panels and soft areas add movement of their own.
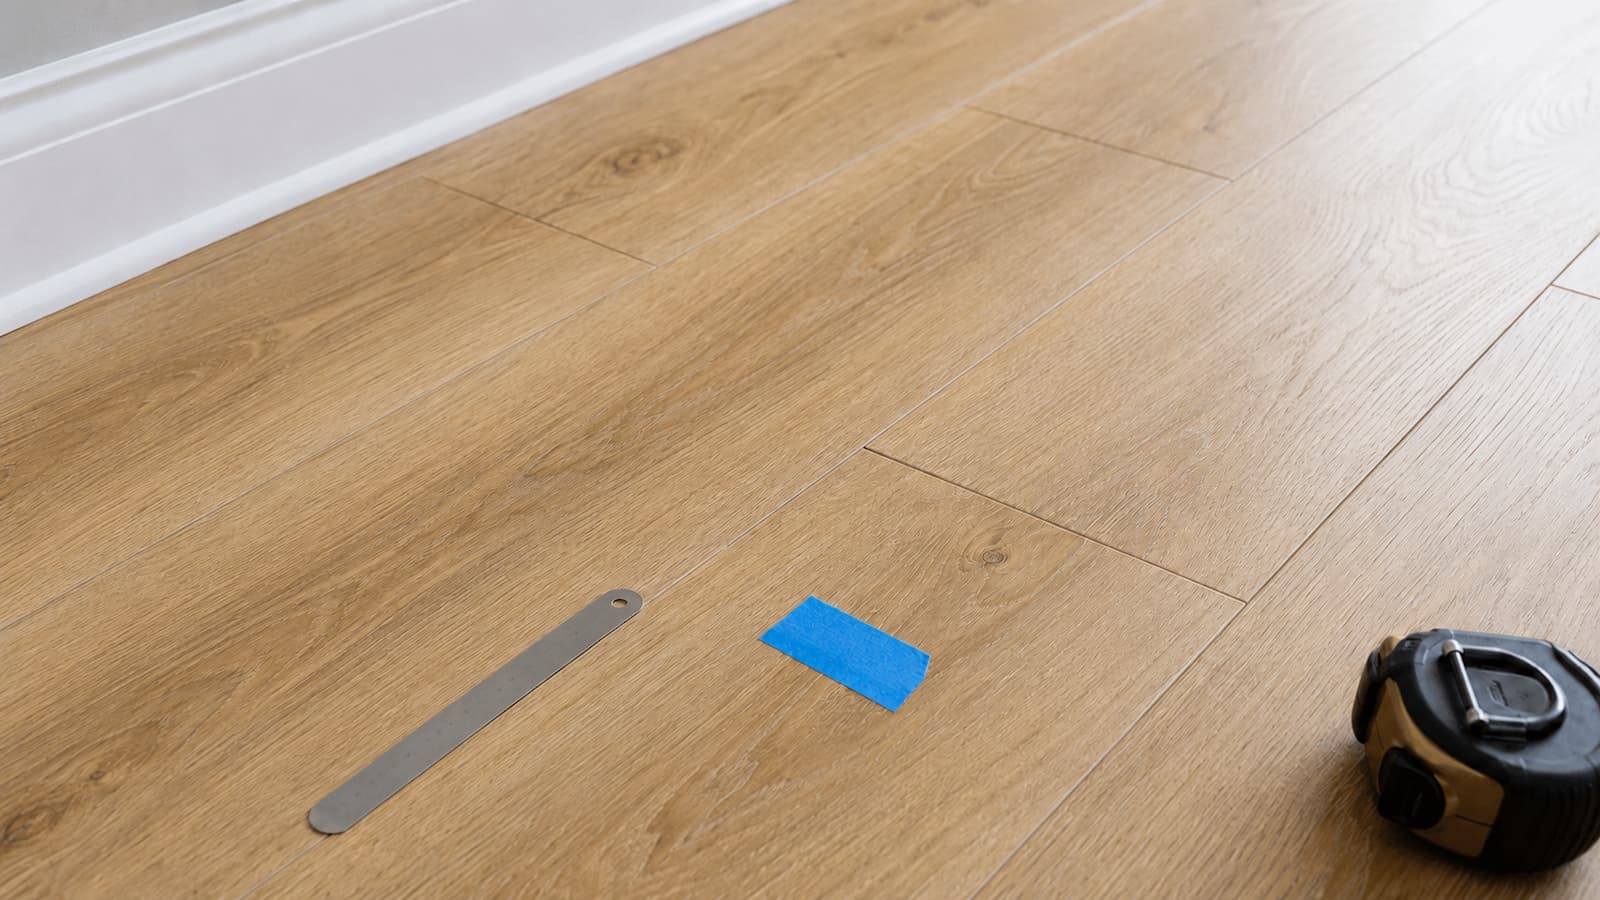
On site, repeatability is often the giveaway. If the click occurs at exactly the same place whenever someone steps there, mark the spot with painter’s tape. Walk around it from several directions. A broad hollow sound without movement may be normal for some floating floors, but a localized dip, visible deflection, or seam that opens under pressure deserves a closer look.
Manufacturers publish flatness limits for each product. A frequently seen requirement is about 3/16 inch over 10 feet, but that figure is not universal and should never be substituted for the instructions supplied with the actual floor. The installer checks the surface with a long straightedge, maps low and high areas, and decides whether patching, grinding, or more extensive floor leveling is needed.
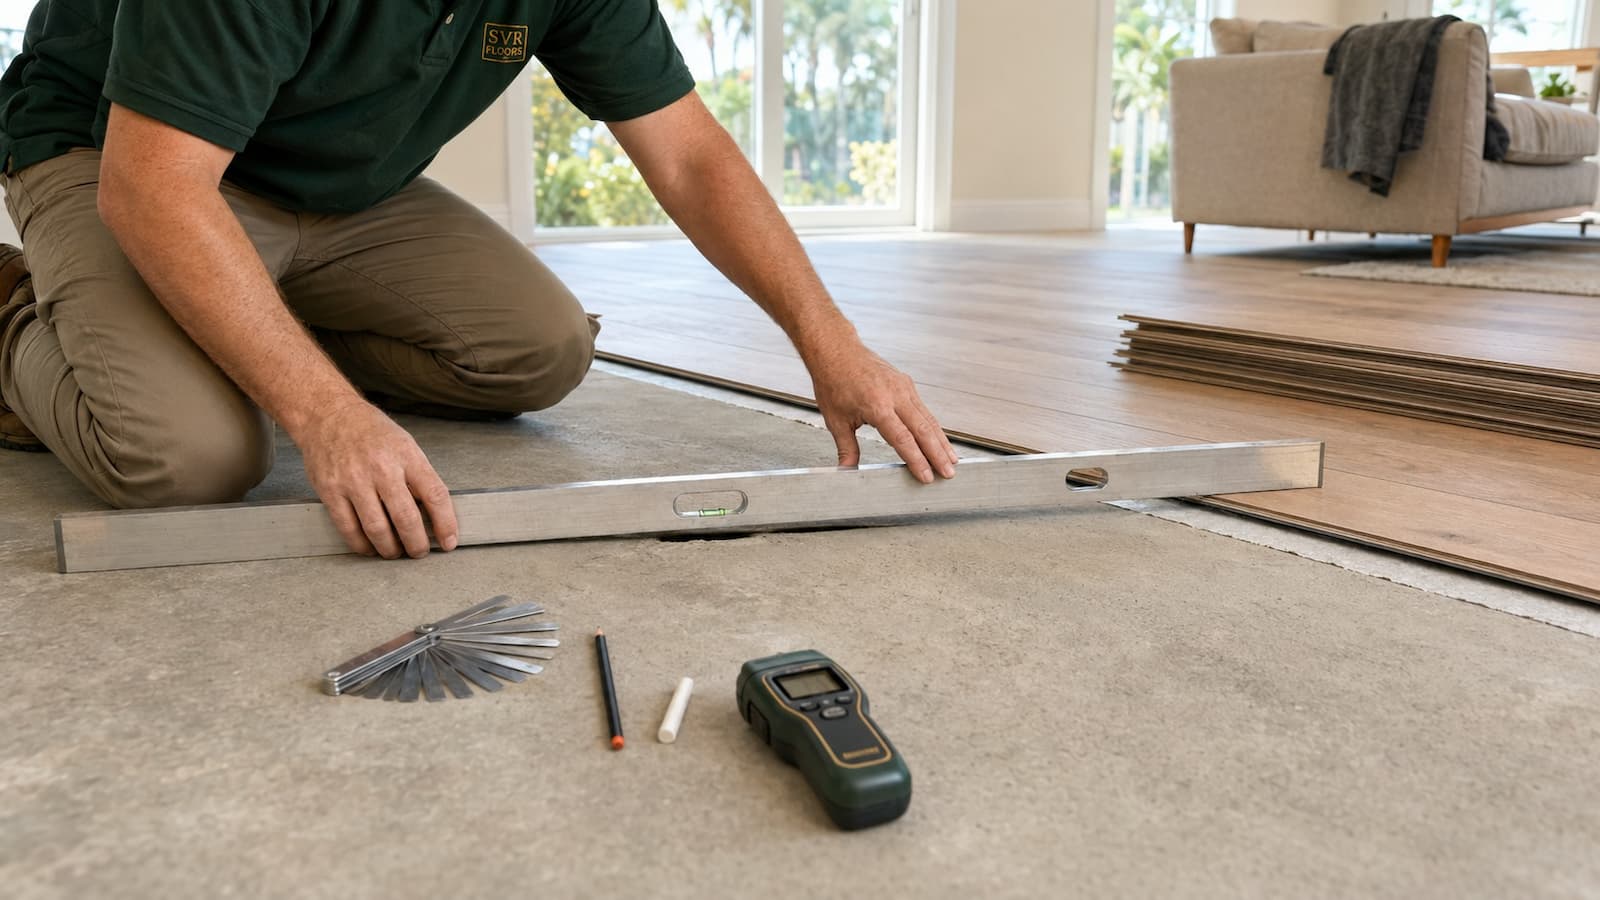
Adding a soft layer over an uneven floor is not a dependable fix. Underlayment compresses; it does not turn a wavy slab into a flat one. If the product already has an attached pad, a second layer may create more vertical movement than its locking system was designed to tolerate. That is why the product instructions must approve both the type and thickness of any added underlayment.
For a deeper explanation of tolerances and measurement, see how flat a floor needs to be before installing LVP.
Cause 2: A Click-Lock Joint Was Never Fully Engaged
A seam can look closed from standing height even when the locking profile is only partly engaged. Dust in the groove, a slightly crooked first row, a damaged corner, or the wrong installation angle may keep the tongue from seating completely. The next rows can hide that mistake for a while. Normal foot traffic then exposes it.
End joints are especially easy to misread. Some systems angle together; others use a fold-down or tap-down end lock. Tools and techniques are not interchangeable. Striking the decorative edge directly, using a damaged tapping block, or forcing a joint that is out of alignment can deform the thin locking lip before the floor is ever used.
A partly engaged seam often gives a crisp tick or snap when stepped on. You may also see a fine dark line, a tiny height difference, or one corner that moves under fingertip pressure. If the seam closes when the plank is unloaded and opens when weight returns, support beneath it should be checked too. A sound lock on a flat base should not need daily pressure to remain closed.
Cause 3: The Locking Edge Has Chipped or Broken
Once part of a click-lock lip breaks, sliding the planks together may improve the appearance without restoring the connection. The gap returns because the feature that resists separation is gone. This is common after repeated flexing over a low spot, but it can also happen during installation, disassembly, or an earlier repair.
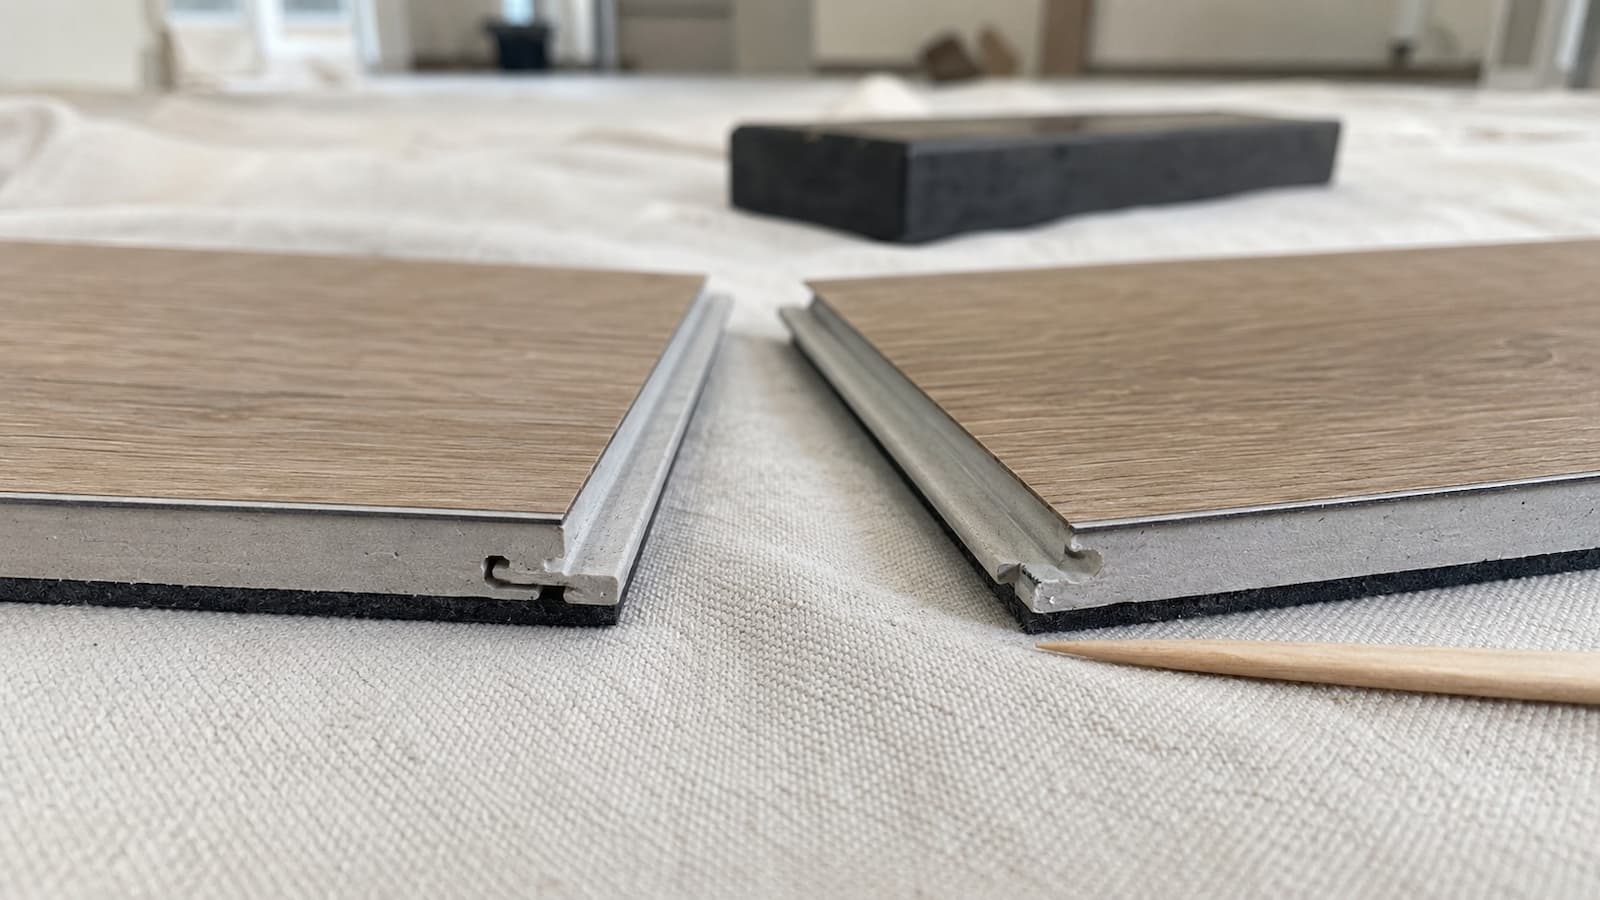
Look for a gap that repeatedly opens at the same joint, pale core material in the seam, a corner that will not sit flat, or a faint crunch when the area is pressed. The real condition of the profile is often impossible to confirm from above. The planks may need to be disassembled from the nearest accessible wall, or a repair may require a controlled cut-out method suited to that product.
A replacement plank is usually the safer answer when the lock is visibly fractured. Adhesive in a click joint is not a universal repair. It can prevent later disassembly, squeeze onto the wear surface, interfere with movement, and violate the product instructions. Some manufacturer-approved repair procedures do use adhesive, but the adhesive and method have to match the flooring system.
Cause 4: The Floating Floor Is Pinned and Cannot Expand Freely
A floating floor needs clearance around walls and every fixed object. The required space is commonly around 1/4 inch, but some products call for more or less, and larger rooms or intense temperature exposure may change the rule. The key measurement is the smallest clearance anywhere along the perimeter, not the average gap where it is easy to see.
Expansion space can disappear in surprisingly ordinary places. A plank may touch drywall behind the baseboard. A door casing may not be undercut deeply enough. A transition track can be screwed through a plank. Shoe molding may be nailed downward into the floor instead of into the wall or baseboard. Caulk can harden in the gap.
Kitchen islands, cabinets, vanities, and built-ins can trap a floating installation if they sit on top of it or are fastened through it. One missed pinch point is enough.
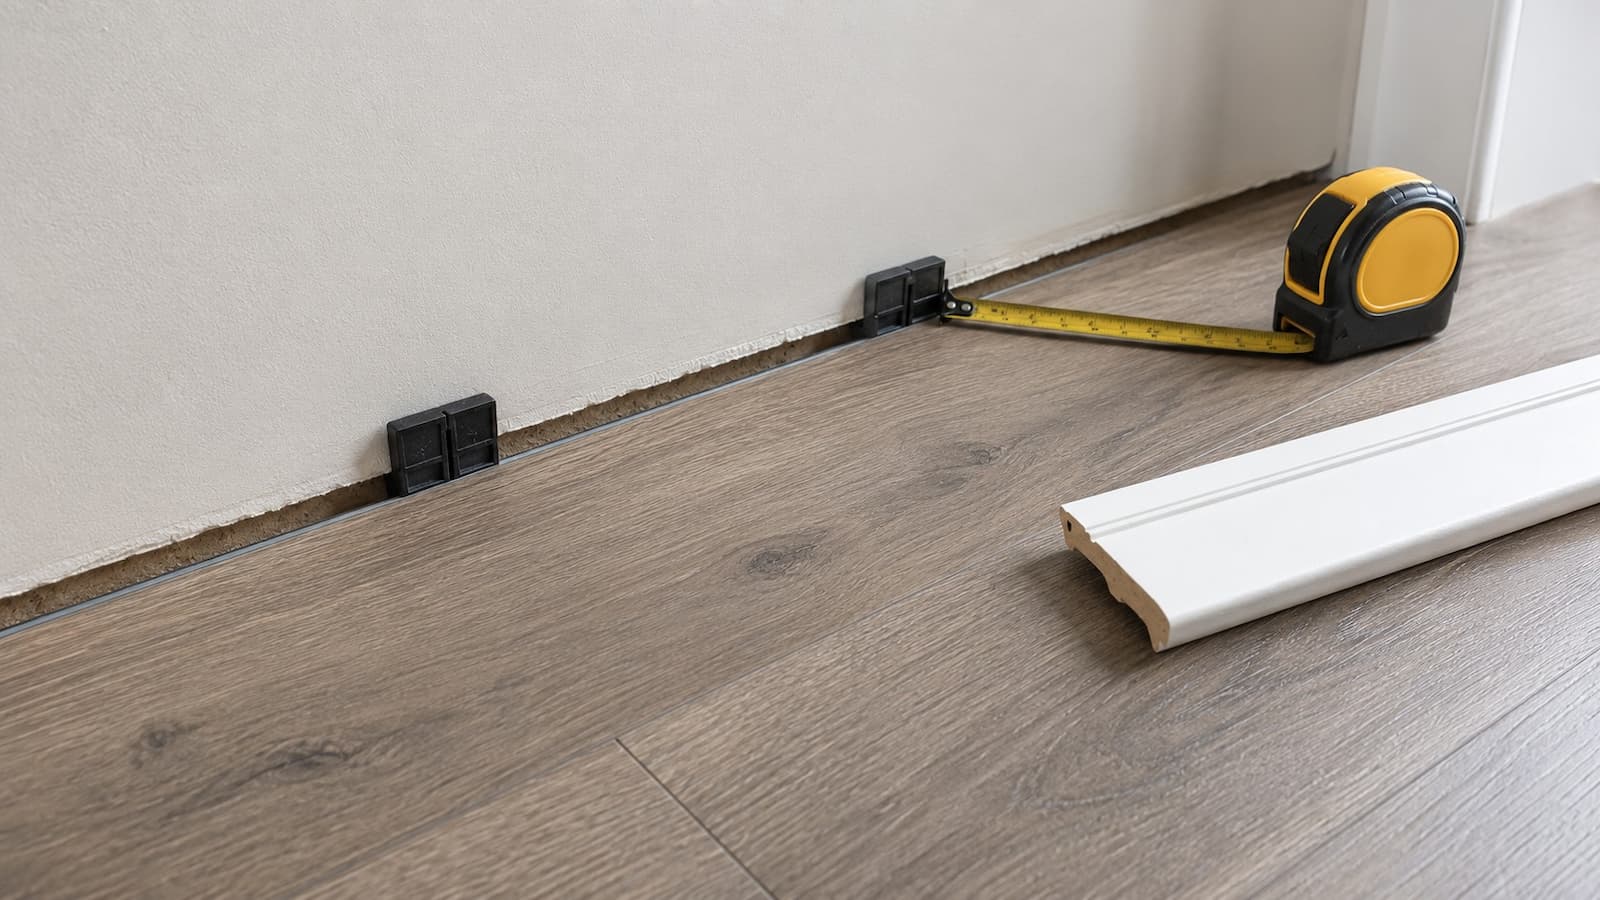
When one part of the field is pinned and another part responds to heat or normal indoor changes, stress collects at the weakest joints. Some seams may compress while others open. The floor can also tent or peak near a wall. Cutting relief at one visible edge may not solve the problem if another pinch point remains under a doorway or cabinet.
Trim should conceal the clearance without crushing the planks. Transitions should restrain or separate the floor only as the product system intends, and their fasteners should go into the substrate without catching the floating material. These small finish details have an outsized effect on how the floor behaves months later.
Cause 5: Direct Sunlight or Large Temperature Swings Are Concentrating Stress
Florida sunlight through a sliding glass door can heat one part of a floor far above the room’s thermostat setting. The affected planks warm while the shaded field stays cooler. If the run is long, the perimeter is tight, or a heavy island divides the floor, that local change can show up as compressed seams, opened joints, or movement near the glass.
The pattern usually offers a clue. Problems that appear beside floor-to-ceiling windows, after the home sat without air conditioning, or only during the hottest part of the day deserve an environmental review. Window coverings may reduce solar load, but they do not repair a broken lock or create missing expansion space. The installation still has to meet the product’s permitted temperature range and perimeter requirements.
Acclimation is product-specific as well. Some rigid-core LVP can be installed without a traditional acclimation period if the material and room are already within the required conditions. Other products call for cartons to condition in the installation area. “LVP never needs acclimation” is just as unreliable as assuming every product needs 48 hours. Read the instructions for the exact SKU, and keep the building within the required range before, during, and after installation.
Cause 6: The Layout Places Too Much Load on Vulnerable Joints
The first row sets the geometry for every row that follows. If it wanders, later planks may be forced sideways to close their ends. The surface can look acceptable at completion while the locks remain under tension.
Narrow first or last rows, very short end pieces, tiny cuts at doorways, and seams placed too close together can make the installation less stable.
Most click-lock instructions specify a minimum distance between end joints in neighboring rows. Eight inches is common in residential plank guides, but it is not a rule for every product. Repeating “H” joints or stair-step patterns can concentrate stress and make a weak layout more noticeable. The correct stagger is both a structural and visual requirement.
Continuous flooring through several rooms also needs planning. A narrow doorway connects two large fields that may receive different sunlight, air conditioning, and traffic. Some products allow long uninterrupted runs; others require transition moldings at certain dimensions or doorways. Removing every transition for a seamless look may create a run the manufacturer never approved.
Heavy stationary furniture does not always cause a problem, but it can change how a floating field responds. A loaded bookcase, stone-topped island, pool table, or bank of built-ins may hold one zone while the rest of the floor tries to move. Rolling loads can be harder on click joints because they repeatedly deflect a small area. Furniture protectors help distribute point loads, but they cannot compensate for a floor that lacks support.
Cause 7: The Underlayment Is Too Soft, Too Thick, or Not Approved
Underlayment has a limited job. Depending on the product, it may provide sound control, vapor management, or a small amount of comfort. It is not a leveling system. When too much cushion sits beneath rigid planks, the edges can move vertically as people walk across them. That repeated hinge action is hard on thin click-lock profiles.
Double padding is a common source of trouble. A plank with an attached pad may not allow another foam layer beneath it. Even when an additional layer is permitted, its density and thickness usually have limits. Using whatever roll is already in the garage is risky because “for vinyl floors” does not mean compatible with every vinyl locking system.
Wrinkles, overlapped seams, and untaped vapor-barrier joints can also create localized movement. Over concrete, vapor-control requirements vary. Some manufacturers call for a specific polyethylene film or moisture system; others tie the requirement to test results and slab conditions. For more context, read whether a moisture barrier is needed under vinyl plank flooring on concrete.
Cause 8: Moisture or Subfloor Damage Is Allowing the Floor to Move
This is where “waterproof” is often misunderstood. Waterproof LVP is not the same thing as a waterproof flooring assembly. The plank face may tolerate spills, while water still travels beneath the floor at walls, transitions, appliance openings, or penetrations. On concrete, excess vapor can affect adhesives, patches, contaminants, and the environment under the floor. On wood, a leak can swell or weaken panels and create new high spots, low spots, or soft areas.
Watch for a recent change. If clicking or movement began after a refrigerator line leaked, a toilet overflowed, a sliding door admitted rain, or an air-conditioning drain backed up, investigate before trying to close the seams. Musty odor, staining at baseboards, damp transitions, or a soft feel raises the priority.
The source must be stopped first. Wet materials may need to be exposed and dried, and damaged underlayment or wood-based subfloor may require removal. Covering a moisture problem with adhesive or snapping the floor back together can trap the evidence while the substrate continues to deteriorate. SVR FLOORS provides subfloor repair when the movement comes from a damaged or unstable base rather than the finish material alone.
Why End Joints Separate More Often Than Long-Side Seams
The short end of a plank has less locking length than the long side. It can also sit close to another end joint in the next row, land over a low spot, or receive sideways force from a misaligned row. That combination makes end gaps one of the most visible LVP complaints.
An isolated end gap sometimes comes from a single joint that was not seated. Several end gaps lined up across neighboring rows suggest a broader layout or movement issue. Gaps scattered near a sunlit exterior wall may point toward heat and restricted expansion. A gap next to a soft or clicking area brings the substrate back into focus.
Homeowners sometimes use a shoe, suction cup, or strong tape to slide the plank closed. That can be a reasonable diagnostic clue: if the plank moves easily, the field has some freedom. It is not proof that the repair is complete. If the gap returns, the lock may be damaged or another force is still moving the row.
Long-side separation deserves prompt attention because the edge can chip when left exposed. Do not keep walking on a raised seam. Protect the area from traffic until it can be inspected, especially if the corner catches socks, shoes, or a vacuum head.
Why Glue-Down LVP Moves or Releases
A glue-down floor should feel firm because each plank is bonded to the surface. Movement is usually local rather than a whole field shifting together. Pressing a loose area may produce a sticky click, a hollow sound, or visible edge movement.
Adhesive needs the correct substrate, trowel notch, coverage, working time, and rolling procedure. If it is spread over dust, old sealer, paint, incompatible patching, or damp concrete, the bond may release from the floor even when adhesive remains on the back of the plank. If a plank was placed after the adhesive passed its working window, transfer may be too low. If furniture or foot traffic returned too soon, the plank may shift before the bond developed.
Moisture complicates the diagnosis. It can exceed the adhesive’s limit, weaken patching material, or bring alkaline salts to the surface. A repair that only re-glues the visible plank may fail again if the slab condition is unchanged. The installer may need to remove a test plank, examine where the bond released, check the substrate, and confirm the adhesive system before choosing a repair.
Individual glue-down planks are often repairable when the surrounding material and substrate remain sound. Matching spare planks make the result much easier. Dye lots and embossing can change, so keeping a labeled carton from the original installation is useful for both floating and glued floors.
Can Separated or Clicking LVP Be Repaired Without Replacing the Whole Floor?
Often, yes. The visible plank gets the blame, but the cause may sit several rows away or directly underneath. The scope depends on access, product condition, room layout, and whether matching planks are available. A floating floor with one incompletely engaged joint near a wall may be disassembled, corrected, and reinstalled. A localized low spot may be reachable after several rows are lifted. A damaged plank can sometimes be replaced without disturbing the entire room.
Repair becomes less predictable when locks have broken across a wide area, the product cannot be sourced, the floor runs continuously through many rooms, or fixed cabinets pin the field. Widespread moisture damage can also change a plank repair into a larger removal and substrate project.
A sound repair follows the cause:
- Map the symptoms. Mark each click, gap, soft spot, raised edge, and affected doorway.
- Check the perimeter and fixed objects. Confirm that the floor is not trapped behind trim, under cabinets, or by fasteners.
- Measure the base where movement occurs. Use a long straightedge after gaining appropriate access.
- Inspect the locking profiles or adhesive transfer. Replace damaged material rather than hiding a failed connection.
- Correct the underlying condition. Level, clean, dry, repair, or relieve the floor as the product instructions allow.
- Reinstall and monitor. Recheck seams, perimeter space, transitions, and the repaired area under normal traffic.
This cause-first approach is the basis of professional floor repair. It avoids turning one visible gap into a series of cosmetic fixes while the same stress continues underneath.
What You Can Check Safely Before Calling a Flooring Contractor
You do not need to dismantle the floor to collect useful information. Start with painter’s tape and mark every place where you hear or feel movement. Note whether the sound occurs when stepping on the middle of a plank, directly on a seam, or only while approaching from one direction.
- Photograph gaps with a ruler or coin nearby for scale.
- Record whether gaps change between morning and late afternoon.
- Note direct sunlight, exterior doors, air-conditioning outages, or unusual indoor heat.
- List recent leaks, wet cleaning, appliance work, or plumbing incidents.
- Check whether heavy furniture, cabinets, islands, or transitions surround the affected field.
- Look for swollen baseboards, staining, odor, or soft substrate near the problem.
- Find the product name, spare carton, installation guide, invoice, and leftover planks if available.
A short video with sound is especially helpful for an intermittent click. Film the whole area first, then the close-up, so the location is clear. Avoid flooding the seam with cleaner before inspection; liquid can obscure dust patterns and may reach the layers below.
Stop using the area if a seam is raised enough to catch a foot, the floor feels suddenly soft, water is present, or pieces of the locking edge are breaking away. Those conditions can worsen with continued traffic.
Quick Fixes That Commonly Make the Problem Worse
Some online repairs are useful in a narrow set of conditions, but they are often presented without checking the floor system. The risk is not only a poor-looking seam. A shortcut can make later disassembly harder or transfer stress to the next joint.
- Do not screw or nail through a floating plank. The fastener pins the floor and can create new stress nearby.
- Do not fill an active joint with rigid filler. It hides movement without restoring the lock and may chip out.
- Do not inject random adhesive into click-lock seams. Use only a repair method approved for the product.
- Do not hammer the wear edge directly. A hard strike can crush the decorative edge or locking profile.
- Do not add foam beneath an accessible soft spot as a guess. Uncontrolled injection can create a high spot and does not address moisture or a weak substrate.
- Do not cut every visible perimeter edge before finding all pinch points. The floor may still be trapped elsewhere.
- Do not assume waterproof planks make a leak harmless. Water can remain under an intact-looking floor.
Closing a gap with a suction cup or tape is not automatically harmful if done gently, but consider it a test rather than a cure. If the joint stays closed and the lock is sound, the installer can determine why the row shifted. If it reopens, repeated sliding will not rebuild the missing connection.
How Proper Installation Prevents Clicking, Gaps, and Movement
Prevention begins before the first plank is opened. The slab or subfloor should be clean, dry, stable, and within the product’s flatness tolerance. High areas need correction; low areas need an appropriate patch or leveling method. Old adhesive, loose tile, weak patches, and soft wood panels cannot be treated as harmless because the new floor will cover them.
The layout should leave practical first and last rows, approved stagger distances, and workable cuts at doorways. Each lock needs to be inspected as the row is built. If a gap appears, installation should stop there. Continuing several rows and hoping the floor will pull itself together makes the correction harder.
Perimeter space must continue around walls, pipes, casings, cabinets, fireplace bases, and other fixed objects. Trim attaches to the wall or baseboard, not through the floating material.
Long connected runs and narrow doorways are checked against the manufacturer’s transition rules. The room and material remain within the required temperature range.
Moisture planning belongs in the installation scope, particularly over Florida concrete slabs. The right approach may include testing, a compatible vapor-control layer, leak correction, or substrate work. LVP itself may tolerate water on top while the system below still needs protection.
Professional vinyl plank flooring installation should account for all of these details. The clean seams people see at the end depend on measurements and preparation that disappear under the finished floor.
Frequently Asked Questions About LVP That Separates, Clicks, or Moves
Is some movement normal with a floating LVP floor?
A floating floor is not bonded to the substrate, but it should still feel supported and stable in normal use. A slightly different sound from tile or glue-down vinyl may be normal. Noticeable deflection, recurring clicks in one spot, seams that open, or edges that rise are not conditions to dismiss as “just floating.”
Why did my LVP start clicking months after installation?
A delayed symptom may come from repeated flexing over a low spot, a joint that gradually loosened, seasonal or solar temperature changes, a new pinch point, moisture, or movement in the subfloor. The date alone does not identify the cause, but it helps separate installation-day engagement problems from conditions that developed later.
Can I use a mallet and tapping block to close a gap?
Only if the product’s repair instructions allow it and the correct edge can be accessed without damaging the floor. A tapping block should bear against the part of the profile designed for it, never the exposed decorative edge. If the lock is broken or the floor is pinned, tapping the plank closed will not provide a lasting repair.
Will the gaps close on their own?
Some seams change slightly as temperature conditions stabilize, but relying on that is risky. A gap caused by a broken lock, uneven base, or shifted row is unlikely to repair itself. An exposed edge can collect debris and suffer more damage, so recurring or widening gaps should be inspected.
Does clicking mean the subfloor needs complete replacement?
No. A concrete low spot may need localized patching, and a loose wood panel may need targeted fastening or repair. Complete replacement is reserved for broader damage, instability, or moisture-related deterioration. The finished planks may still need replacement if their locking edges have failed.
Can a heavy kitchen island make floating LVP separate?
It can contribute if the island sits on top of the floating field or is fastened through it, because that area can no longer move freely. Installation details vary, so the product guide and cabinet plan should be reviewed together. Problems near an island can also come from an uneven slab or tight cuts around the base.
Should transitions be installed in every doorway?
Not automatically. Requirements depend on the product, continuous run dimensions, doorway width, room conditions, and layout. Some systems allow uninterrupted residential runs; others call for transitions at doorways or beyond stated dimensions. Follow the instructions for the installed flooring rather than a universal rule.
Can the same planks be reinstalled after the floor is opened?
Often they can, provided the locking edges remain intact and the product permits disassembly. Brittle or damaged locks may break during removal, particularly if the floor has been under stress. Spare planks should be available before opening a large area so the repair is not left unfinished.
When It Is Time for a Professional Inspection
Arrange an inspection when gaps return after being closed, several joints are changing, a seam sits higher than the next plank, the same area flexes with every step, or the problem follows a leak. Widespread movement, broken core material, musty odor, and soft substrate are stronger reasons not to delay.
A useful inspection does more than label the symptom. It traces the affected rows, checks the perimeter and fixed objects, measures flatness where possible, reviews the installation method, and looks for moisture or substrate damage. If planks need to come up, the installer can inspect the locks and the surface directly before recommending patching, plank replacement, perimeter relief, adhesive correction, or a broader reinstall.
The smallest visible gap is not always the whole repair. Sometimes one loose end joint is exactly that: one joint that needs to be reset. Other times it is simply the first place a larger installation problem becomes visible. That difference is worth finding early, before another exposed edge chips and a small repair becomes a room-wide one.
If your LVP is separating, clicking, or moving in Largo or a nearby Tampa Bay community, an experienced flooring contractor can inspect the finished floor and the conditions beneath it, then explain whether a localized repair is realistic or the affected area needs to be opened and corrected.