
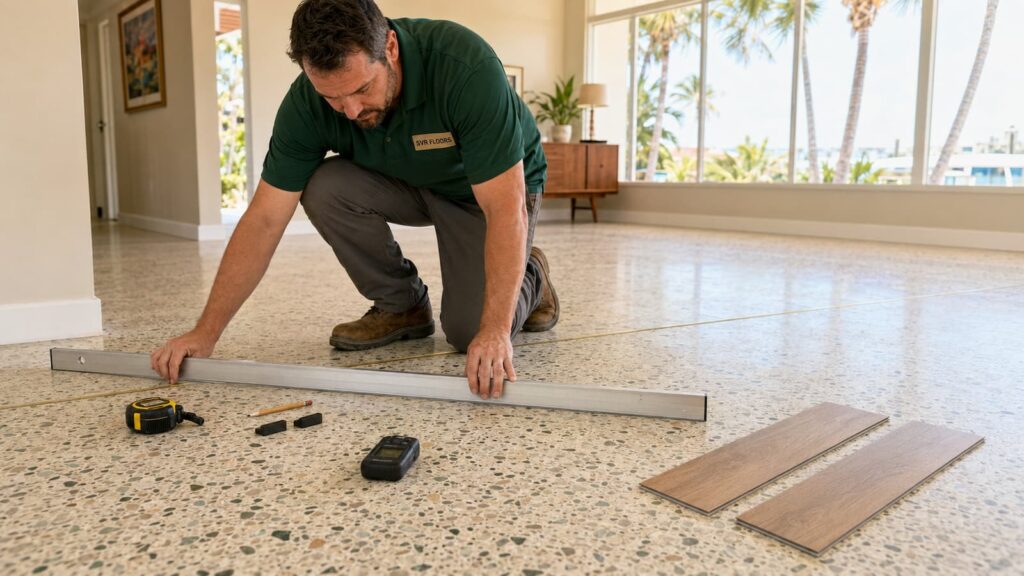
Terrazzo has a habit of surviving every remodel around it. In many older Florida homes, it runs from the front door through the living area as one continuous surface, sometimes disappearing under carpet, sheet vinyl, or a later tile installation. When the goal is a warmer wood-look floor, covering that terrazzo with luxury vinyl plank can seem like the obvious next step.
Sometimes it is. A sound terrazzo floor can provide a hard, stable base for certain floating LVP products. Keeping it may avoid demolition, reduce dust, and preserve a surface that a future owner could potentially uncover again. But terrazzo is not automatically ready just because it is hard and polished. Old wax, topical sealer, cracks, proud divider strips, patchwork, moisture from the slab, and slight waves in the floor can all change the installation plan.
The installation method changes the answer too. Floating rigid-core LVP rests on the prepared surface and is often the more practical overlay candidate. Glue-down LVP needs a reliable bond to every layer below it, so a dense polished floor or an old coating becomes a much bigger concern. One product may list terrazzo as an acceptable substrate; another may distinguish cement terrazzo from epoxy terrazzo or require an approved underlayment system first.
One question comes before any grinding or patching: is the terrazzo worth restoring instead? A floating floor can be relatively reversible. Mechanical abrasion, adhesive, and broad cementitious skim coats are not. This guide explains when LVP over terrazzo can work, what Florida homeowners should inspect, how floating and glue-down systems differ, and when preserving, repairing, or exposing the original floor is the better move.
The Short Answer: Yes, but the Terrazzo Must Qualify as the Substrate
LVP can be installed over terrazzo when the exact flooring instructions permit it and the terrazzo is sound, dry enough, clean, flat, and free of anything that would interfere with the planned system. Cracks and divider strips need to be understood rather than simply hidden. Finished height must still work at exterior doors, sliding tracks, appliances, transitions, and fixed cabinetry.
A useful decision starts with the conditions below:
| What to Check | Overlay May Be Reasonable | Stop and Reassess |
|---|---|---|
| Terrazzo type | The product guide approves the identified cementitious or other terrazzo assembly | The type is unknown, specifically excluded, or covered by an incompatible coating |
| Surface condition | The floor is hard, stable, and free of loose or powdery repairs | Sections are debonded, crumbling, lifted, or moving vertically |
| Flatness | The terrazzo meets the selected LVP tolerance after approved corrections | Broad waves, abrupt ridges, or proud repairs would leave planks unsupported |
| Cracks and joints | Cracks are stable and the treatment follows the full flooring system | A crack is active, displaced, wet, or associated with a true moving joint |
| Finish and contamination | Wax, sealer, polish, oil, and residue can be removed by an approved method | The surface cannot accept the required primer, patch, or adhesive reliably |
| Moisture | Testing and site history fit the product and adhesive limits | Efflorescence, recurring dampness, odor, leaks, or excessive slab moisture remain unresolved |
| Finished elevation | Doors, appliances, trim, and adjoining floors still function safely | The added layers trap an appliance, block a door, or create a poor transition |
Passing most of the checks is not the same as passing all of them. A floor can be beautifully flat and still have a sealer that defeats glue-down adhesive. It can be spotless and still transmit moisture from the concrete below. One active joint or one trapped dishwasher may be enough to change the scope.
The final approval comes from the current installation guide for the exact LVP, not from a general statement that vinyl plank “can go over hard surfaces.” If you are planning professional vinyl plank flooring installation, identify the product before the preparation method is chosen.
Why Terrazzo Is Different From Ordinary Tile or Bare Concrete
Traditional cementitious terrazzo is a composite finish made with stone or other aggregate in a cement-based matrix. Installers place it over a supporting slab or underbed, divide larger areas with metal strips, then grind and polish the surface. In a Florida house from the postwar period, the terrazzo may be part of the original architecture rather than a later decorative floor.
That construction creates a surface with no ceramic-tile grout grid, but it brings its own details. Brass, zinc, or other divider strips may sit slightly high. Old repairs can have a different hardness from the surrounding matrix. A crack may stop at a strip, cross it, or follow a joint in the slab. Years of polishing and maintenance can leave a dense surface with multiple layers of wax or sealer.
Bare concrete and terrazzo are related in many homes because both are mineral surfaces connected to the slab. They are not interchangeable from a preparation standpoint. A patch that bonds well to porous concrete may need a different primer or surface profile over polished terrazzo. A surface moisture reading may also behave differently over a sealed finish than it does over properly prepared exposed concrete.
Terrazzo tile adds another possibility. Precast squares or large panels have joints and a separate bond layer, so they behave more like an installed tile field. The advice in this guide focuses mainly on original poured terrazzo over a concrete base. If the floor has a repeated square grid, determine whether it is terrazzo tile before treating it as a monolithic surface.
Epoxy terrazzo uses a resin matrix rather than a conventional cementitious matrix. It can be very dense and nonporous. Some LVP instructions allow properly prepared terrazzo generally, while other published guides treat cement terrazzo as potentially suitable and epoxy terrazzo as an unacceptable direct substrate. Settle that distinction before anyone specifies a primer, leveling compound, or adhesive.
Before Covering It, Decide Whether the Terrazzo Should Be Restored
Original terrazzo is not just an inconvenient layer under the next floor. It may be a durable finish that suits the house, can be repaired, and is difficult to recreate at the same character and cost. A dull or stained surface can look beyond saving while still responding well to professional restoration. Carpet tack holes, minor cracks, and mismatched patches do not automatically rule it out.
Restoration deserves a closer look when the floor is largely continuous, the aggregate is attractive, and the problems are mostly cosmetic. It may also be the simpler option in a sunroom or at a sliding door where heat, water exposure, or limited threshold clearance makes LVP less comfortable. Terrazzo handles those conditions differently from a floating plank system.
Covering can make sense when the homeowner strongly prefers a wood-look floor, the terrazzo has extensive visible repairs, or connected rooms need one more consistent finish. A floating LVP installation may preserve the possibility of future exposure, provided the prep does not permanently alter the floor. The practical limit is that a poor surface cannot be protected merely for reversibility. If flatness correction or contamination removal is necessary, the terrazzo may still need localized abrasion or patching.
Glue-down LVP is a more permanent decision. It may require stripping finishes, grinding a polished surface, applying primer and underlayment, then bonding plank across the entire room. Removing that system later can leave adhesive and patch attached to the terrazzo. Ask the restoration question before those steps begin, not after a test area has already been abraded.
- Have a terrazzo specialist assess whether stains, dullness, holes, and old repairs are restorable
- Compare the visual goal for the entire house, not one isolated room
- Decide how much permanent preparation an LVP overlay would require
- Check whether a future owner could remove a floating system without major damage
- Photograph the original floor and repair history before it is covered
A homeowner does not have to prefer terrazzo because it is original. Still, it is worth making the choice with a clear view of what will be preserved and what will be changed.
Manufacturer Instructions Do Not Treat Every Terrazzo Floor the Same Way
Published installation guides illustrate the variation. The examples below are useful because they show the questions a contractor should ask. They are not a universal specification and should not be combined into one set of limits.
| Published Guide Example | What It Says About Terrazzo | Practical Lesson |
|---|---|---|
| Karndean rigid core | Groups terrazzo with quarry tile, mosaics, and ceramics; requires a firm, dry surface free of wax, oil, and dust, with loose areas corrected | Even a floating product treats surface condition and contamination as real requirements |
| Mohawk SolidTech Plus | Allows installation over fully adhered, smooth, sound, dry terrazzo that meets that product’s stated flatness limits | “Terrazzo allowed” still comes with measurable conditions |
| Novalis resilient flooring guide | States that cement terrazzo may be suitable, while epoxy terrazzo is not an acceptable direct substrate in that guide | The matrix and complete preparation system can change approval |
| Shaw residential direct glue | Requires terrazzo to be cured, bonded, clean, free of wax and oils, repaired, and appropriately prepared for adhesion | Glue-down work depends on the bond through every interface |
Installation guides can change. Product lines from the same manufacturer can also differ. The carton, current technical document, approved underlayment, adhesive, patch, primer, moisture limit, and room-use restrictions all belong to one decision.
Retail shorthand can blur this distinction. “Waterproof” or “suitable over existing floors” does not establish that the exact terrazzo, surface finish, moisture condition, or extra pad has been approved. Marketing describes the product. Installation instructions define the assembly.
Check Cracks, Repairs, and Divider Strips Before Flatness Work Begins
Terrazzo can crack without becoming an unusable substrate. The pattern and movement matter more than the mere presence of a line. A fine old crack with no vertical displacement may remain unchanged for years. A fresh crack that widens, changes elevation, carries moisture, or continues through walls and thresholds needs more investigation.
Old repairs tell part of the story. A narrow color-matched fill that remains hard and flush is different from a broad patch that sounds hollow or powders under a scraper. Tap testing can help map suspicious areas, but sound by itself is not a structural diagnosis. The matrix thickness, underbed, slab, and room acoustics all influence what a section sounds like.
Divider strips need identification too. In many terrazzo floors, the metal strip controls panel size, separates colors, or gives the installer a working boundary. It is not automatically an expansion joint. At another location, a strip may align with a construction or control joint in the slab. A true expansion or isolation joint is designed for movement and should not be treated as a cosmetic groove that can be buried under patch and plank.
Look for these warning patterns:
- Vertical displacement from one side of a crack to the other
- A crack that continues through several rooms or returns after repair
- Rust staining, white mineral deposits, or dampness along the line
- Loose matrix at the edge of a divider strip
- A metal strip that sits high enough to rock a straightedge
- Broad hollow areas or patches that flex under concentrated pressure
- Movement where the terrazzo meets an addition or a different slab
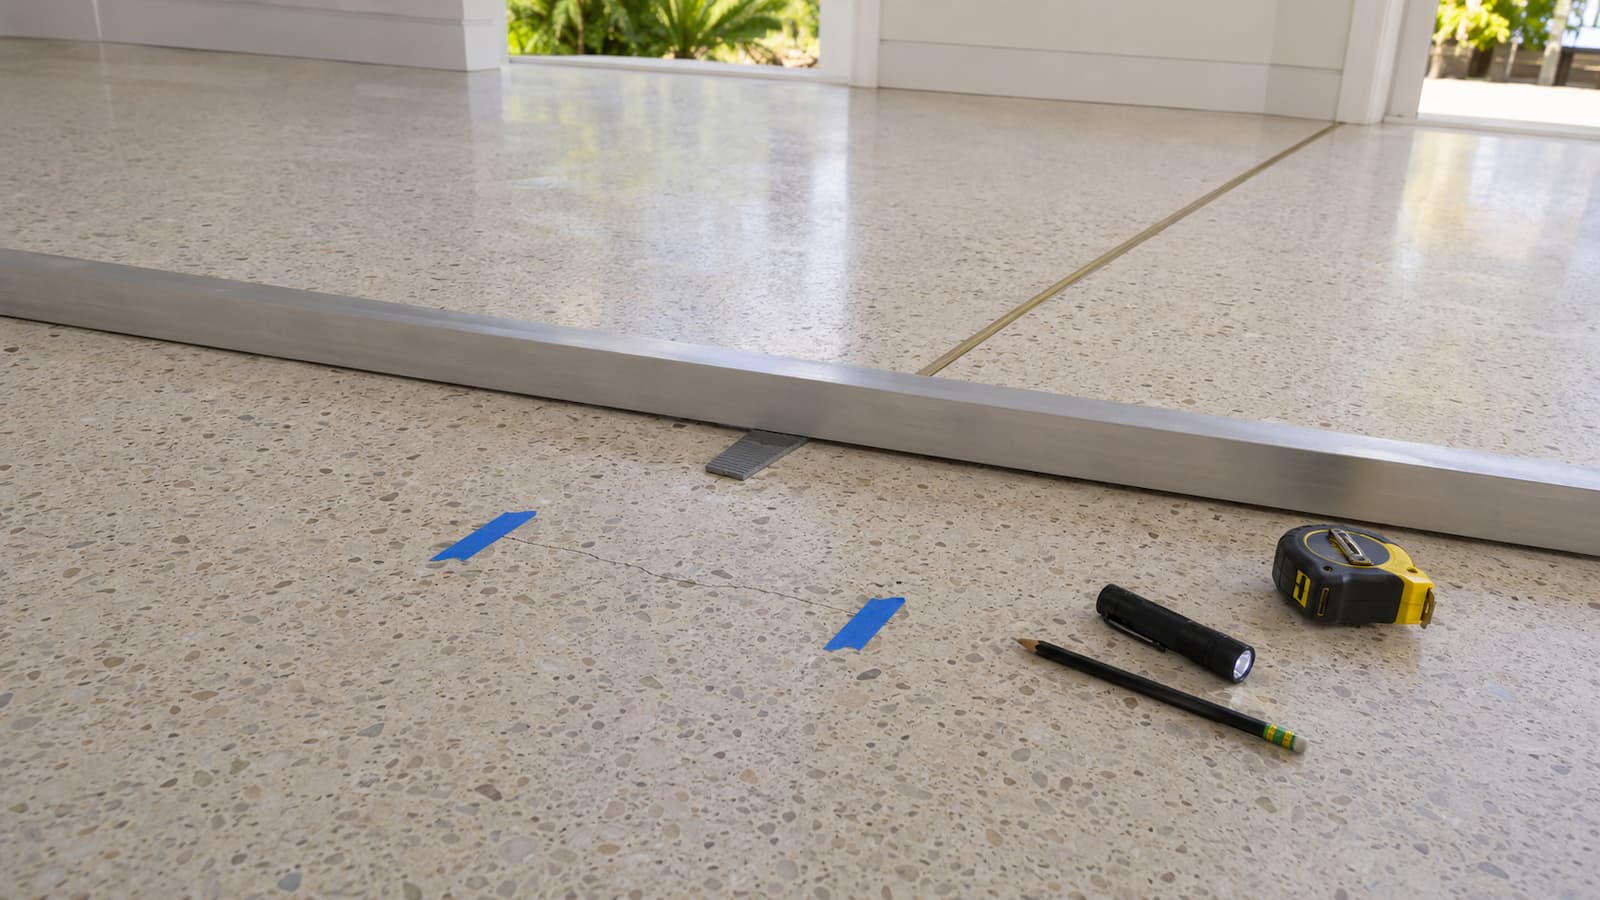
A stable non-moving crack may accept a repair system approved by the preparation and flooring manufacturers. An active joint may need to continue through the floor assembly with a compatible joint cover or planned break. Do not turn a moving line into a hidden pressure point simply because floating plank can bridge across it on installation day.
Terrazzo Must Be Flat Enough for the Exact LVP
A polished floor can look perfectly smooth while drifting up and down across a longer span. Terrazzo often follows the slab below it, and older slabs may have broad shallow depressions, ridges at room additions, or localized repairs. Light reflecting from the polish can make a wave easy to see, but it can also hide a small abrupt change.
Floating click-lock LVP needs continuous support. When a plank bridges a low spot, footsteps bend it toward the surface. The movement may produce a click or hollow response long before a joint opens. A high spot creates a different problem: the plank can pivot there, loading the surrounding locks and making the row feel unstable.
The check uses a long straightedge in multiple directions. It should cross divider strips, old repairs, doorways, and the lines where rooms were once separated. A short level can find an abrupt ridge, but it may miss the broad low area that affects a long run of planks.
Compare every gap and rocking point with the selected LVP guide. Product tolerances vary, and the number from a different carton is not a safe default. The distinction between flat and level still applies: a room can slope gradually yet support planks consistently, while an apparently level room may contain a sharp hump that fails the flatness requirement. SVR Floors explains that distinction in its guide to floor flatness before LVP, laminate, or tile.
A shallow isolated low may take a terrazzo-compatible patch. A broad depression may require a primer and self-leveling or smoothing system approved for that surface. Proud metal, ridges, and hard repairs may need controlled grinding. Each method changes the preservation question, so map the correction before work starts.
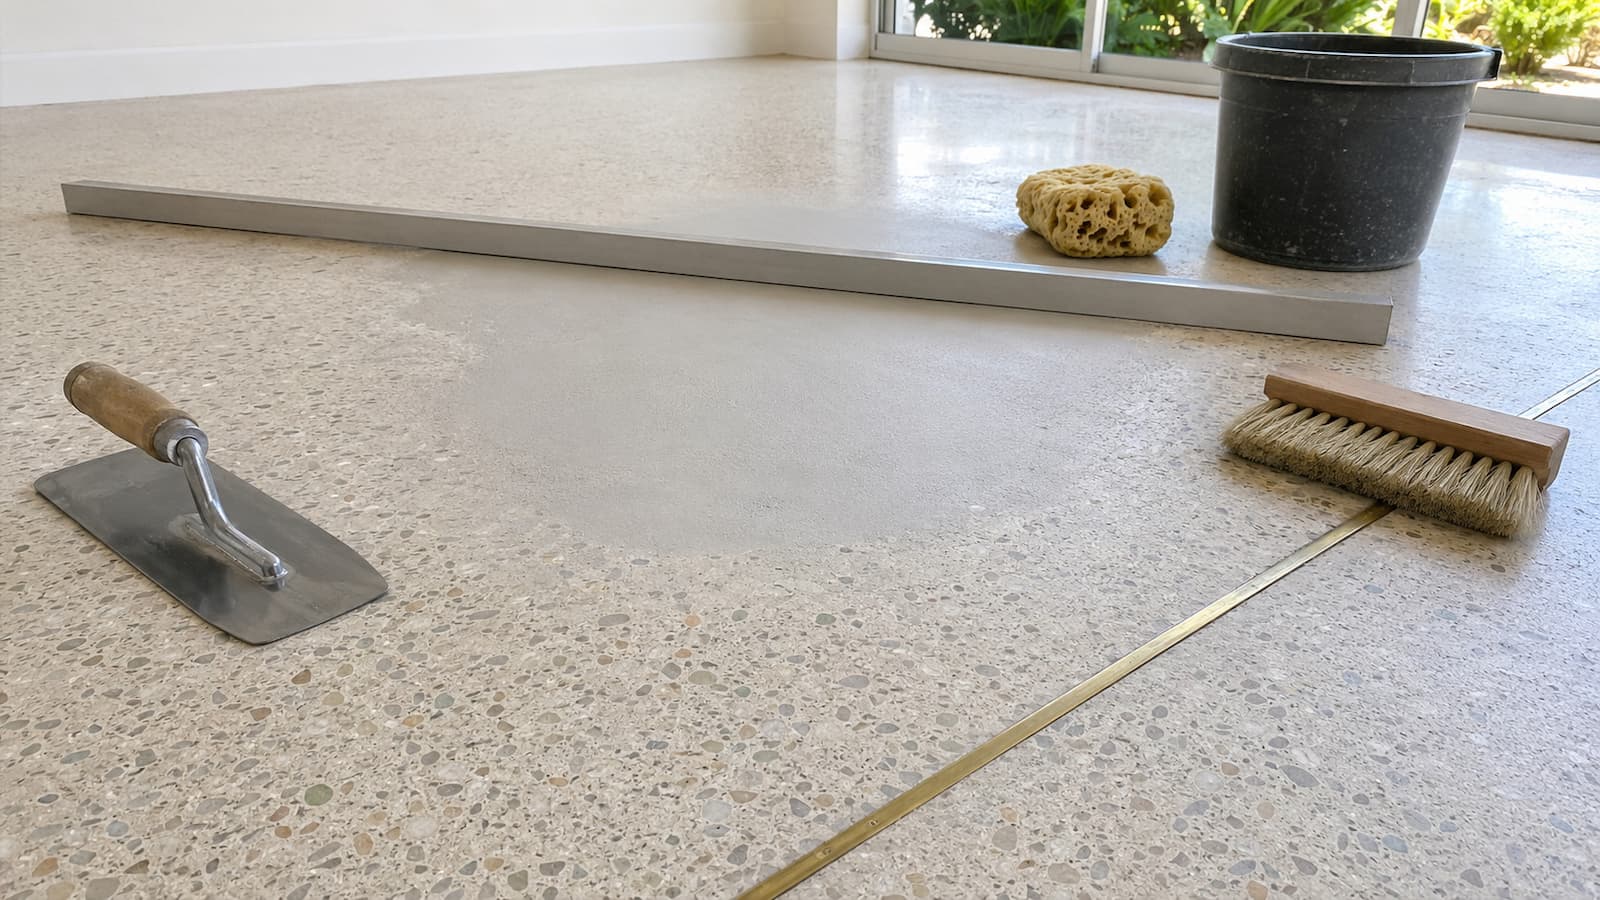
The patch has to do more than dry hard. It must bond to the terrazzo, accept the layer above it, tolerate the site’s moisture conditions, and finish without a ridge. A generic bag chosen because it says “floor patch” may not satisfy those requirements.
Extensive corrections may shift the economics toward professional floor leveling, a full preparation system, or removal of the problem layer. The goal is not to hide every chip in the terrazzo. It is to create the support the LVP requires.
Wax, Polish, Sealer, and Cleaning Residue Can Defeat the Next Layer
Older terrazzo may have received decades of maintenance. Some floors were waxed regularly. Others carry an acrylic finish, penetrating sealer, topical coating, polishing compound, or household product that leaves a film. The surface can look clean and still reject primer, patch, or adhesive.
For floating LVP, contamination may appear less important because the planks are not glued to the floor. It still matters wherever a patch, crack repair, or leveling material must bond to terrazzo. Residue can also trap odor or interfere with tape used at an approved vapor-control seam. A slick floor should not be treated as prepared simply because nothing visible rubs off on a cloth.
Glue-down installation makes the issue unavoidable. The adhesive relies on the prepared surface or on a bonded smoothing layer. If old wax remains below that layer, the floor has a weak release plane. The adhesive may stay attached to the patch while the patch releases from the terrazzo.
Cleaning and profiling should follow the selected system. Some products require stripping, thorough rinsing, and neutralizing. Others call for mechanical abrasion and a compatible primer. Chemical adhesive removers and oily cleaners can drive residue into a mineral surface and create a new bond problem. Aggressive grinding is not a default either, especially when restoration remains an option or an unidentified old adhesive is present.
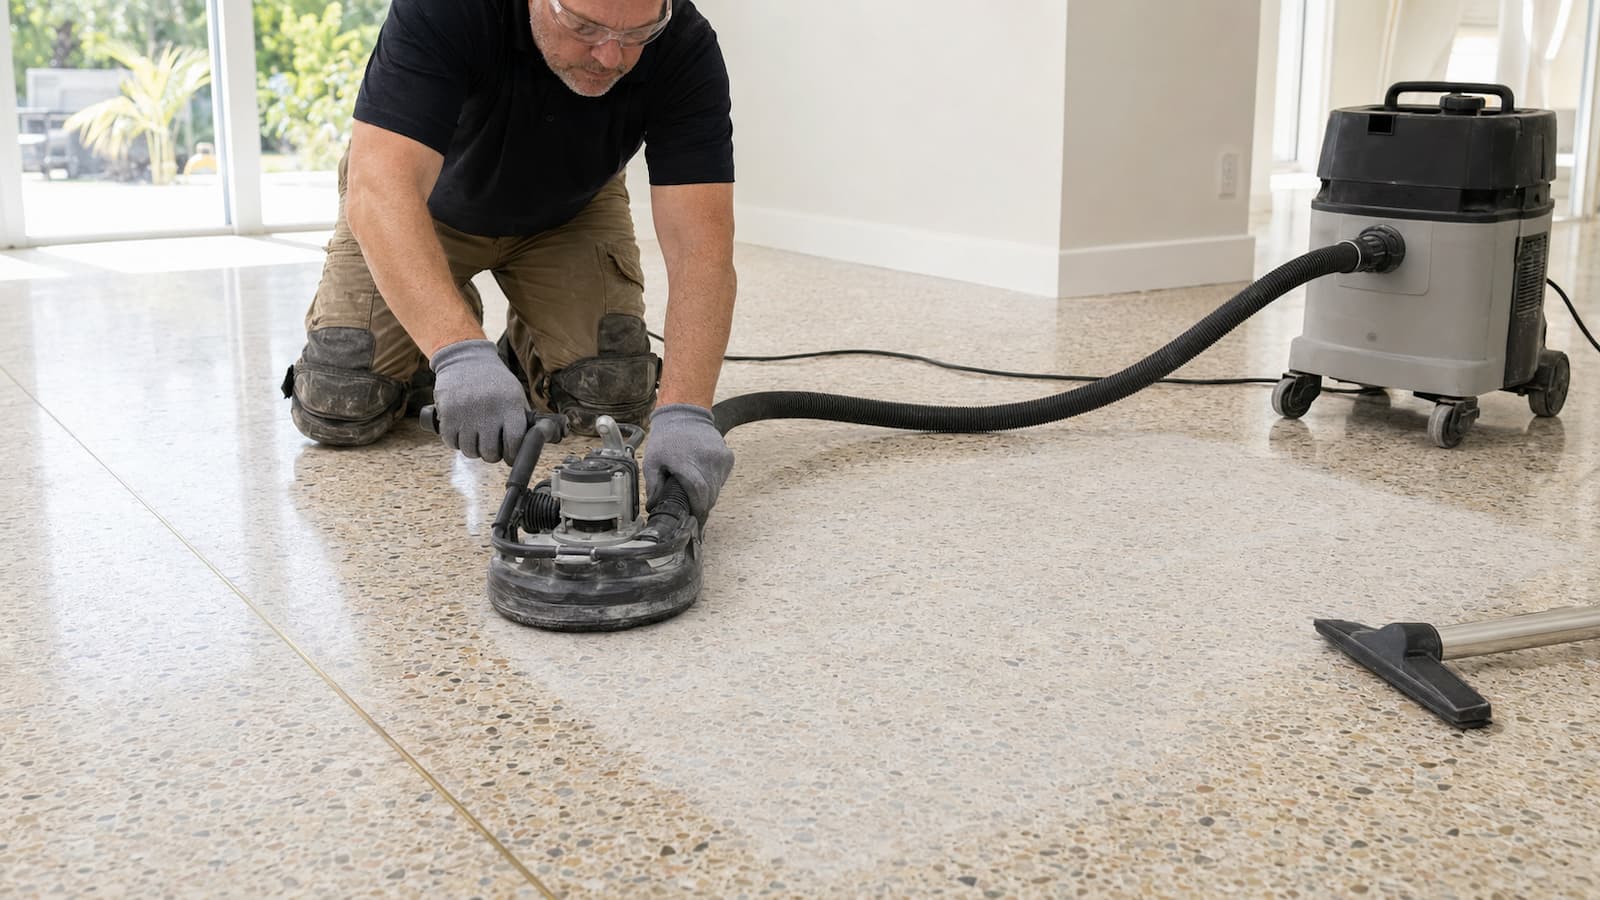
A small bond test can be useful for glue-down work and broad skim coating. It does not replace the manufacturer’s preparation requirements, but it can reveal an incompatible finish before the entire floor is covered. Test areas should include old repairs and visibly different sections, not only the cleanest square in the room.
Safety belongs in this step. Terrazzo itself is not the usual asbestos concern, but black mastic, resilient-floor residue, or another unidentified layer left from an older covering may contain regulated material. Do not sand, scrape, or grind suspect residue based on color or age alone. Have it assessed before mechanical preparation creates dust.
Moisture Still Matters Under a Terrazzo Floor
Most original residential terrazzo in Florida sits on or connects closely to a concrete slab. The polished surface may look dry while moisture vapor moves through the slab and matrix. A topical sealer can slow or redirect that movement, but it should not be assumed to function as the vapor-control layer required by an LVP manufacturer.
Start with the room’s history. White mineral deposits, darkening along a crack, musty odor, loose base, recurring dampness after heavy rain, and stains near a sliding door deserve attention. So do old plumbing leaks, AC drain problems, refrigerator lines, and water that entered during a storm. Liquid water from a leak is different from normal vapor transmission; both need a plan before the area is covered.
A handheld meter can help compare suspicious areas, but a reading taken on polished or sealed terrazzo does not automatically establish the moisture condition of the concrete slab. Formal methods have specific preparation, depth, exposure, and ambient-condition requirements. Testing through an existing finish may require a specialist to determine where and how the underlying base can be evaluated without producing misleading numbers.
The limits come from the exact flooring product and adhesive. Some floating products require a specified polyethylene sheet or approved vapor-control underlayment over a concrete-connected substrate. Other products use different instructions. Glue-down LVP has no loose plastic sheet between the plank and floor; adhesive moisture limits and any compatible mitigation system control that assembly.
Waterproof plank does not make the enclosed space beneath it harmless. LVP may resist a spill from above while moisture affects patch, adhesive, underlayment, trim, odor, or indoor conditions below. SVR Floors’ guide to moisture barriers under vinyl plank on concrete explains why the plank rating and the slab plan are separate questions.
Floating, Glue-Down, and Loose-Lay LVP Need Different Terrazzo Preparation
Change the installation method and the same terrazzo can move from acceptable to impractical. These are the pressure points that change with it:
| Installation Method | How It Interacts With Terrazzo | Main Conditions to Resolve |
|---|---|---|
| Floating rigid-core LVP | Planks lock together and rest over the prepared floor | Flat support, approved vapor or acoustic layer, expansion space, heat exposure, finished height |
| Glue-down LVP | Planks bond to a prepared terrazzo or bonded smoothing system | Wax and sealer removal, surface profile, primer and patch compatibility, adhesive bond, moisture and pH limits |
| Loose-lay or perimeter-adhered LVT/LVP | Product relies on dimensional stability, friction, and product-specific adhesive zones | Exceptional smoothness, contaminant removal, room-size limits, perimeter details, manufacturer approval |
Floating rigid-core LVP is often the least invasive approach. The attached pad or approved underlayment separates the plank from minor surface texture, and there is no full-spread adhesive on the terrazzo. That does not allow the floor to float over broad lows, raised strips, loose patches, or active cracks. The locks still carry the movement created below them.
Glue-down LVP usually demands the most work. Thin plank can telegraph patch edges and surface variation. Adhesive has to grip a compatible, uniformly prepared layer. Broad smoothing may be necessary even when the terrazzo looks visually smooth, and the process can permanently change a restorable floor.
Loose-lay products are not simply floating planks without locks. Their dimensional stability, friction backing, room limits, perimeter adhesive, and subfloor smoothness requirements are product-specific. A published guide may allow one layer of properly prepared terrazzo after all wax and sealer is removed, while another product uses a different substrate list.
Homeowners comparing the first two approaches can review the detailed differences between floating and glue-down vinyl plank flooring in Florida homes. The best method is the one compatible with the room and substrate, not the one with the shortest installation description.
Underlayment Cannot Level Terrazzo or Stabilize a Crack
Underlayment gets assigned jobs it cannot perform. Depending on the approved system, it may provide vapor control, sound reduction, limited thermal separation, or the resilient backing attached to the plank. It is not a structural repair and it does not turn a wavy terrazzo floor into a flat one.
A soft layer follows the low spot. When a plank spans that depression, the pad compresses and the plank still moves. Making the pad thicker can increase vertical travel at the click-lock edge. That is particularly risky when the LVP already has attached backing and the manufacturer does not permit a second cushioned layer.
Vapor-control material has a separate job. If the LVP guide treats the terrazzo and its concrete base as a mineral substrate requiring a sheet, use the specified material and seam treatment. Do not assume the polished terrazzo replaces it. Do not add plastic under glue-down LVP, where the plank needs direct adhesion to an approved surface.
Condo projects add acoustic documentation. A board may specify minimum impact and airborne sound performance, a particular underlayment, or a complete tested assembly. That requirement still has to remain compatible with the plank. Stacking a condo pad under an attached-pad product without written approval can trade one compliance problem for a locking-system problem.
Correct the terrazzo first. Select underlayment only after flatness, movement, contamination, and moisture have been resolved.
A Professional LVP-Over-Terrazzo Project Usually Follows This Sequence
The first row is too early if the substrate decision is still open. Once several rows are locked together, reopening the floor can damage edge profiles and turn a correctable condition into wasted material.
- Identify the floor. Confirm whether the surface is poured cement terrazzo, epoxy terrazzo, terrazzo tile, or a coating designed to resemble it. Record visible divider strips, repairs, and later flooring residue.
- Consider restoration. Compare the terrazzo’s condition, character, and repair potential with the preparation required for the intended LVP. Do this before abrasion or full-spread materials make the choice harder to reverse.
- Review the exact LVP system. Check approved substrates, flatness, attached pad, added underlayment, vapor control, expansion space, room size, temperature, direct sun, and transition instructions.
- Map the finished height. Measure interior and exterior doors, sliding tracks, appliances, cabinets, toilet flanges, closet guides, step-downs, base details, and every adjoining floor.
- Inspect cracks, strips, and repairs. Mark vertical displacement, hollow or powdery areas, proud metal, recurring cracks, old holes, stains, and joints that may move.
- Measure flatness. Place a long straightedge in multiple directions through rooms, doorways, and former wall lines. Compare the actual gaps and rocking points with the product tolerance.
- Build the moisture plan. Review leak history and visible evidence, then use the test methods and limits required by the flooring, adhesive, and preparation system.
- Remove contaminants safely. Deal with wax, polish, sealer, oil, soap film, and old adhesive using an approved method. Test suspect older residue before creating dust.
- Repair and smooth. Use compatible materials for stable cracks, holes, low areas, and surface transitions. Prime or mechanically profile where the selected system requires it.
- Recheck the finished substrate. After curing, look for ridges, pinholes, loose edges, new high spots, contamination, and flatness gaps. Preparation is not complete merely because material was applied.
- Install without trapping the floor. Lay out rows, maintain perimeter clearance, preserve required moving joints, tape approved sheet seams, and fasten trim or transitions without pinning a floating assembly.
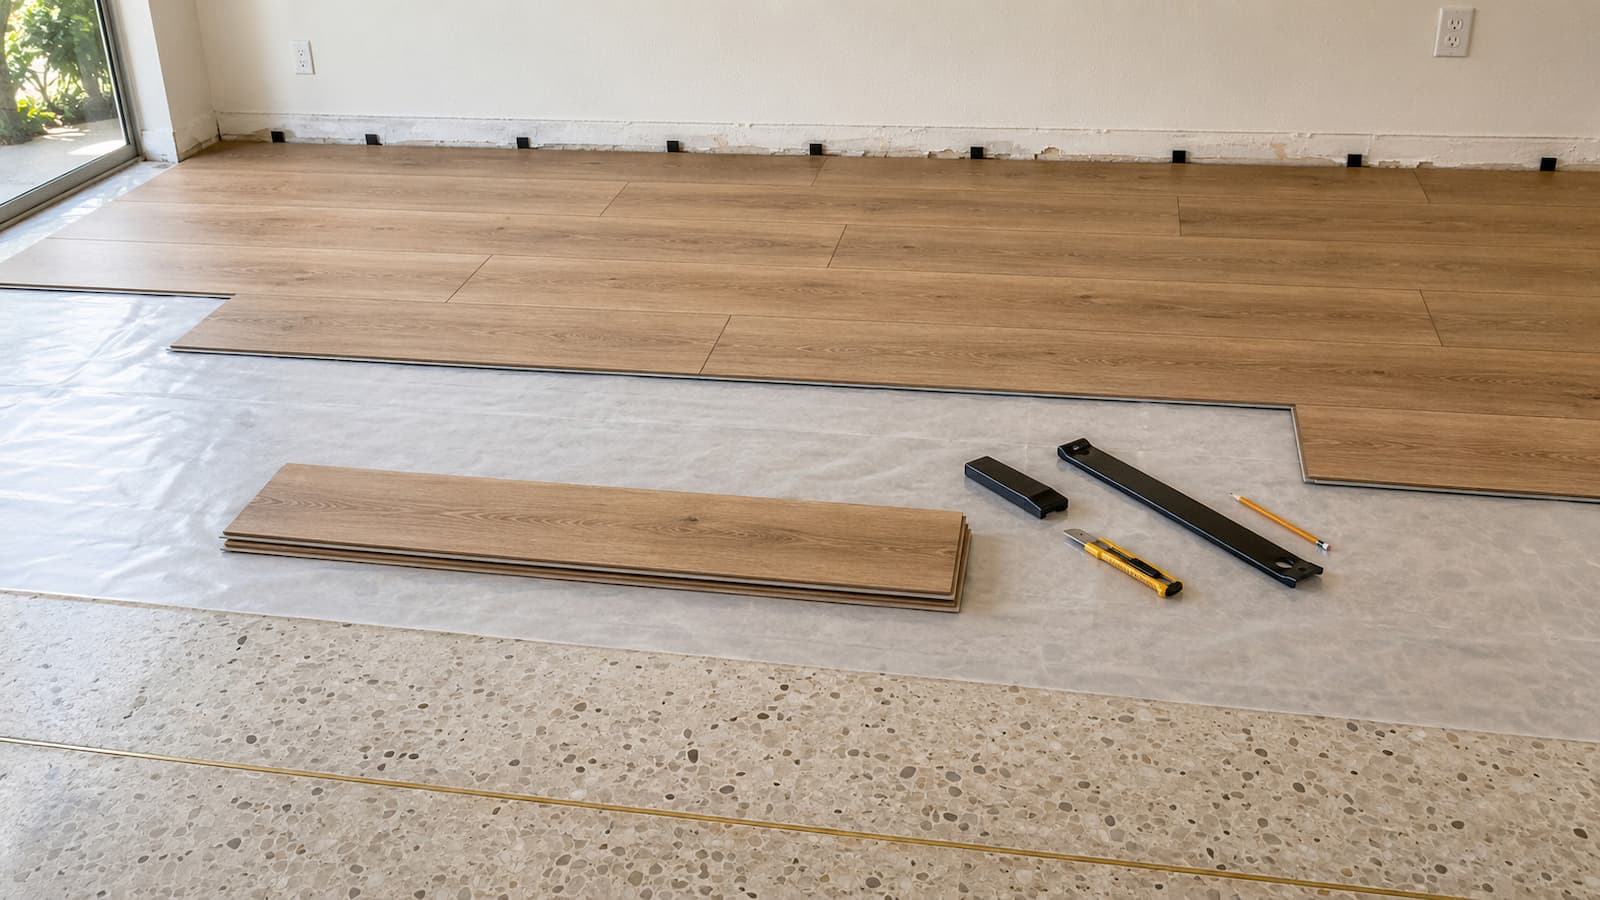
A clean terrazzo floor may need only limited correction before an approved floating system. Another room may need enough grinding, patching, and moisture work that the supposed overlay is no longer a shortcut. The sequence stays useful because it exposes that difference before plank is committed.
Added Floor Height Can Change Doors, Appliances, and Transitions
Original terrazzo often finishes neatly at exterior thresholds and sliding-door tracks because the house was designed around that elevation. LVP adds its own thickness, attached backing, possible vapor-control layer, and any smoothing material. A few millimeters across a sample stack can become a serious conflict at a fixed detail.
Sliding doors deserve an early measurement. The new floor cannot block drainage paths, cover a track, or remove the clearance needed to clean and operate the panel. Exterior swing doors may have limited room for trimming, and changes to rated or weather-sealed doors should not be improvised.
Kitchens hide a slower problem. A dishwasher may continue running for years after LVP is installed in front of it, yet become trapped between the raised floor and countertop when service is finally needed. Ranges, refrigerators, laundry appliances, and freestanding cabinets need enough clearance to move without damaging the plank or catching a transition.
- Interior and exterior door swing
- Sliding-glass-door tracks and sills
- Dishwasher removal beneath a fixed countertop
- Refrigerator, range, washer, and dryer clearance
- Toilet flange and bathroom threshold height
- Closet door guides and floor-mounted tracks
- Step-downs, sunken rooms, and stair noses
- Transitions to carpet, tile, hardwood, or bare slab
- Terrazzo base, conventional baseboards, and door casings
Baseboards may need removal and reinstallation at the new elevation. Door casings can often be undercut, but the cut should leave a controlled expansion gap rather than clamp the floating floor. A transition must also bridge the actual height change without becoming a steep toe-catching edge.
Florida Rooms Create Different Terrazzo-to-LVP Decisions
Living rooms and connected halls
Long sight lines make broad flatness changes easier to feel. A repaired strip where a wall once stood can interrupt a continuous LVP run, and one low traffic path may click repeatedly. If the terrazzo extends through several rooms, inspect the whole route before approving one area at a time.
Kitchens
Appliance access and fixed cabinetry usually control the layout. A floating floor should not be pinned beneath an island or cabinet unless the product specifically allows that arrangement. Old plumbing leaks, refrigerator lines, dishwasher clearance, and transitions to dining areas need to be resolved before the first row.
Bathrooms
An approved LVP may work over sound bathroom terrazzo outside a shower or tub enclosure. Check the toilet flange, vanity, threshold, perimeter instructions, and leak history. Ordinary floating plank should not cover a shower floor, floor drain, or sloped waterproof assembly.
Sunrooms, enclosed lanais, and rooms with large glass doors
These rooms can reverse the decision. Terrazzo may perform well where intense sun and temperature swings fall outside an LVP product’s approved environment. Some rigid-core guides call for larger expansion clearances in sun-exposed spaces; other products exclude unconditioned or flood-prone rooms entirely. “Indoor” does not automatically mean climate-controlled.
Bedrooms where carpet was removed
Carpet can leave tack-strip holes, paint lines, adhesive, pet odor, and fading that make restoration less appealing. Those marks may be cosmetically important while having little effect on a floating overlay. Adhesive residue and damaged patches are different because preparation materials must bond there. Test suspect old mastic before sanding or grinding.
Condominiums
The terrazzo may be sound, but the association can still require written approval, a named acoustic assembly, licensed installation, work-hour controls, and elevator protection. IIC or STC values from an underlayment package do not prove that the same rating applies to the building’s slab and ceiling assembly. Get the documents accepted before flooring is ordered.
When LVP Should Not Be Installed Directly Over Terrazzo
Some floors need repair, a separate approved underlayment system, or a different finish plan. Others should remain exposed. Direct installation is usually a poor choice when any of the following conditions cannot be resolved:
- The exact LVP guide excludes the identified terrazzo type
- The surface has widespread debonding, crumbling matrix, or loose repairs
- A crack has vertical displacement or continues to move
- A true expansion or isolation joint would be buried improperly
- Broad waves or high divider strips remain outside the product tolerance
- Wax, sealer, coating, or chemical residue prevents reliable bonding
- Moisture evidence or a liquid-water source remains unresolved
- The added elevation blocks an exterior door or traps an appliance
- The room is unconditioned, flood-prone, or outside the LVP’s use limits
- Required preparation would destroy terrazzo the homeowner wants to preserve
“Not directly over” does not always mean the terrazzo must be demolished. A product or preparation manufacturer may approve a bonded underlayment, primer, moisture-control system, or other assembly over it. That solution needs to be designed as a complete system. Adding a random layer of plywood, foam, or generic leveler creates more interfaces without proving compatibility.
Removal of poured terrazzo is also different from lifting a floating floor. The finish may be bonded integrally to an underbed or slab, and demolition can be heavy, noisy, and destructive. If the terrazzo itself is structurally sound, restoration or a qualified overlay is often more sensible than removing it solely to reach concrete.
What Can Go Wrong After a Rushed Terrazzo Overlay?
Installation day is a poor stress test. The room is empty, the planks are new, and nobody has crossed the same traffic path hundreds of times. Movement and bond problems appear later.
| Symptom | Possible Terrazzo-Related Cause | Why a Quick Surface Fix Misses It |
|---|---|---|
| Clicking in one location | Low spot, proud strip, hollow repair, or unsupported plank | The plank keeps flexing over the same condition |
| End joint opens | Repeated movement has stressed or damaged the locking edge | Pushing the joint closed does not restore support below it |
| Glue-down plank releases | Wax, sealer, poor surface profile, moisture, or incompatible primer | The weak interface remains underneath the plank |
| Patch cracks or peels | Active movement, contamination, or an unsuitable patch system | Adding material above a weak bond does not strengthen it |
| Odor develops | Moisture, old contamination, or a leak has been enclosed | The visible plank may remain waterproof while the cavity stays damp |
| Floor binds or tents | Insufficient expansion space or the floating floor was pinned | Trimming one plank may not release every fixed point |
| Door rubs or appliance is trapped | The final floor elevation was not mapped | The conflict is geometric, not cosmetic |
Access makes the repair more expensive. Floating plank may need to be disassembled from the nearest practical wall, and click edges can break during removal. Glue-down pieces usually have to be cut out. If the color or batch is no longer available, a local repair can turn into a larger replacement.
A terrazzo problem should be solved while the surface is still visible. Once covered, even locating the exact divider strip, old patch, or crack line becomes harder.
What Homeowners Can Check Without Damaging the Terrazzo
A homeowner can collect useful information before the site visit without drilling, grinding, or prying at the floor.
- Photograph the full room in daylight and under low side lighting
- Mark cracks, repairs, tack holes, stains, and divider strips on a simple room sketch
- Note any area that changes sound or feels different underfoot
- Look for white deposits, dark lines, loose base, or musty odor
- Record leaks, storm water, plumbing repairs, and AC drain incidents
- Measure clearance at doors, sliding tracks, appliances, and transitions
- Identify whether the surface has wax, polish, sealer, or a topical coating
- Find the LVP model number and current installation instructions
- Confirm whether the plank has an attached pad
- Collect condo or HOA flooring documents if the home is in an association
- Ask whether a terrazzo restoration estimate has been considered
Do not create a “test” by sanding a corner. That can damage a restorable finish, release dust from unidentified residue, and still say little about the bond in the rest of the room. A professional assessment can check flatness, surface condition, movement, preparation compatibility, and finished height with much less guesswork.
Some uncertainty may remain until a suspicious patch is opened or a formal moisture test location is approved. A good estimate should identify that contingency instead of presenting the lowest-prep scenario as guaranteed.
Does Keeping the Terrazzo Save Time and Money?
With a clean, sound, flat terrazzo floor and an approved floating product, keeping it can remove an entire demolition phase. There is less debris to haul, less vibration in the home, and less risk of exposing a rough slab that needs extensive correction. Preparation may be limited to inspection, cleaning, localized work, and the specified vapor or underlayment arrangement.
The savings shrink when the floor needs broad abrasion, primer, patch, self-leveling material, crack work, moisture control, or complicated transitions. Glue-down LVP can require enough surface preparation that it no longer behaves like a simple overlay. Preserving a restorable terrazzo floor may also have value that does not appear in a demolition-only price comparison.
Compare complete scopes. The overlay price should address flatness correction, contamination, cracks, divider strips, moisture, doors, appliances, base details, underlayment, and transitions. A restoration price should describe holes, stains, repairs, grinding, polishing, and sealing. If a separate approved underlayment system is required, its preparation and finished height belong in the comparison as well.
The least expensive first step is not always the least expensive floor. A qualified overlay can be efficient. A rushed overlay over uncertain terrazzo merely postpones the work until the new planks are in the way.
Frequently Asked Questions About LVP Over Terrazzo
Can click-lock LVP go directly over terrazzo?
Often, yes, when the exact click-lock product approves the identified terrazzo and the floor is sound, dry enough, clean, and within the specified flatness tolerance. Underlayment or vapor-control rules, perimeter clearance, moving joints, direct sun, and finished height still apply.
Does terrazzo need to be sanded before floating LVP?
Not automatically. A floating system does not need adhesive across the full floor, so sound terrazzo may require only approved cleaning and localized preparation. Areas receiving patch or leveling material may need a specific primer or surface profile. Do not abrade the floor without checking the component instructions and any suspect old residue.
Can glue-down LVP be installed over polished terrazzo?
It may be possible with a complete approved preparation system, but polished terrazzo is not automatically adhesive-ready. Wax, sealer, oil, and dense finish can prevent bonding. The system may require cleaning, mechanical profiling, primer, smoothing, a bond test, and an adhesive approved for the resulting porous or nonporous surface.
Will terrazzo cracks show through rigid-core LVP?
A thin stable line may not become visually obvious through rigid-core plank, but movement below can still affect support and joints. Cracks with vertical displacement, moisture, widening, or repeated failure need investigation. A true moving joint should not be buried as if it were a cosmetic crack.
Do terrazzo divider strips need to be removed?
Usually not when they remain secure and flush enough for the LVP system. A proud strip may need an approved correction. The installer must also determine whether the strip is only a terrazzo divider or aligns with a joint designed to move, because those conditions are handled differently.
Is terrazzo a moisture barrier over a Florida slab?
Do not assume that it is. Cementitious terrazzo and cracks can transmit moisture, and a surface sealer is not necessarily the vapor-control layer required by the LVP manufacturer. Evaluate the slab-connected assembly and follow the exact flooring or adhesive moisture instructions.
Can extra foam underlayment hide a slightly uneven terrazzo floor?
No. Foam follows the unevenness and compresses under traffic. It may increase movement at click-lock joints, especially beneath a plank that already has attached pad. Correct low and high areas with a compatible preparation method, then use only the underlayment the LVP permits.
Can LVP cover old carpet tack-strip holes in terrazzo?
Small stable holes can often be filled flush with an approved repair material before installation. Check for cracks radiating from the holes, loose edges, pet contamination, and uneven patching. The cosmetic color match matters for restoration; bond and flatness matter for an overlay.
Is it better to restore terrazzo or cover it with LVP?
That depends on the terrazzo’s condition, the home’s design, room exposure, the preferred appearance, and how much permanent prep the LVP requires. Restoration can preserve an original durable floor. Floating LVP can provide a warmer wood look with a relatively reversible assembly when the terrazzo needs little alteration.
Can LVP go over terrazzo in an enclosed lanai?
Only if the room stays within the product’s approved temperature, moisture, direct-sun, and occupancy conditions. Many enclosed lanais experience stronger heat swings and water exposure than the rest of the home. The terrazzo may be suitable even when the selected LVP is not.
Will installing LVP damage the terrazzo?
A floating floor with limited compatible prep may leave the terrazzo largely recoverable. Grinding, broad patching, moisture-control coatings, and glue-down adhesive can change it permanently or make later restoration harder. Define the preparation scope before deciding the original floor is being “preserved underneath.”
The Best Overlay Starts With an Honest Terrazzo Decision
Terrazzo can be an excellent base for approved LVP, particularly when a Florida home has a hard, continuous floor that remains flat and stable. Its durability is an advantage. The polish is not proof of readiness, though, and the age of the floor does not explain every crack, repair, coating, or moisture condition.
Floating rigid-core plank is usually the most forgiving and reversible candidate, but it still needs support, expansion space, compatible vapor control, and a workable elevation. Glue-down LVP asks more from the surface and can permanently alter a floor that might otherwise be restored.
For homeowners in Largo and nearby Tampa Bay communities, an experienced flooring contractor can compare restoration and overlay conditions, check flatness and movement, identify preparation risks, and map doors and transitions before the material is committed. A terrazzo floor that passes those checks can stay in place for the right reason. One that fails should not be hidden simply because demolition looks inconvenient.